Launching payments for a Forex merchant is a risk, compliance, and operations decision, not just a technical integration decision, because the quality of onboarding directly affects approval rates, fraud exposure, settlement stability, and long-term portfolio risk.
There are 10 steps a Forex broker should know before starting.
Launch checklist
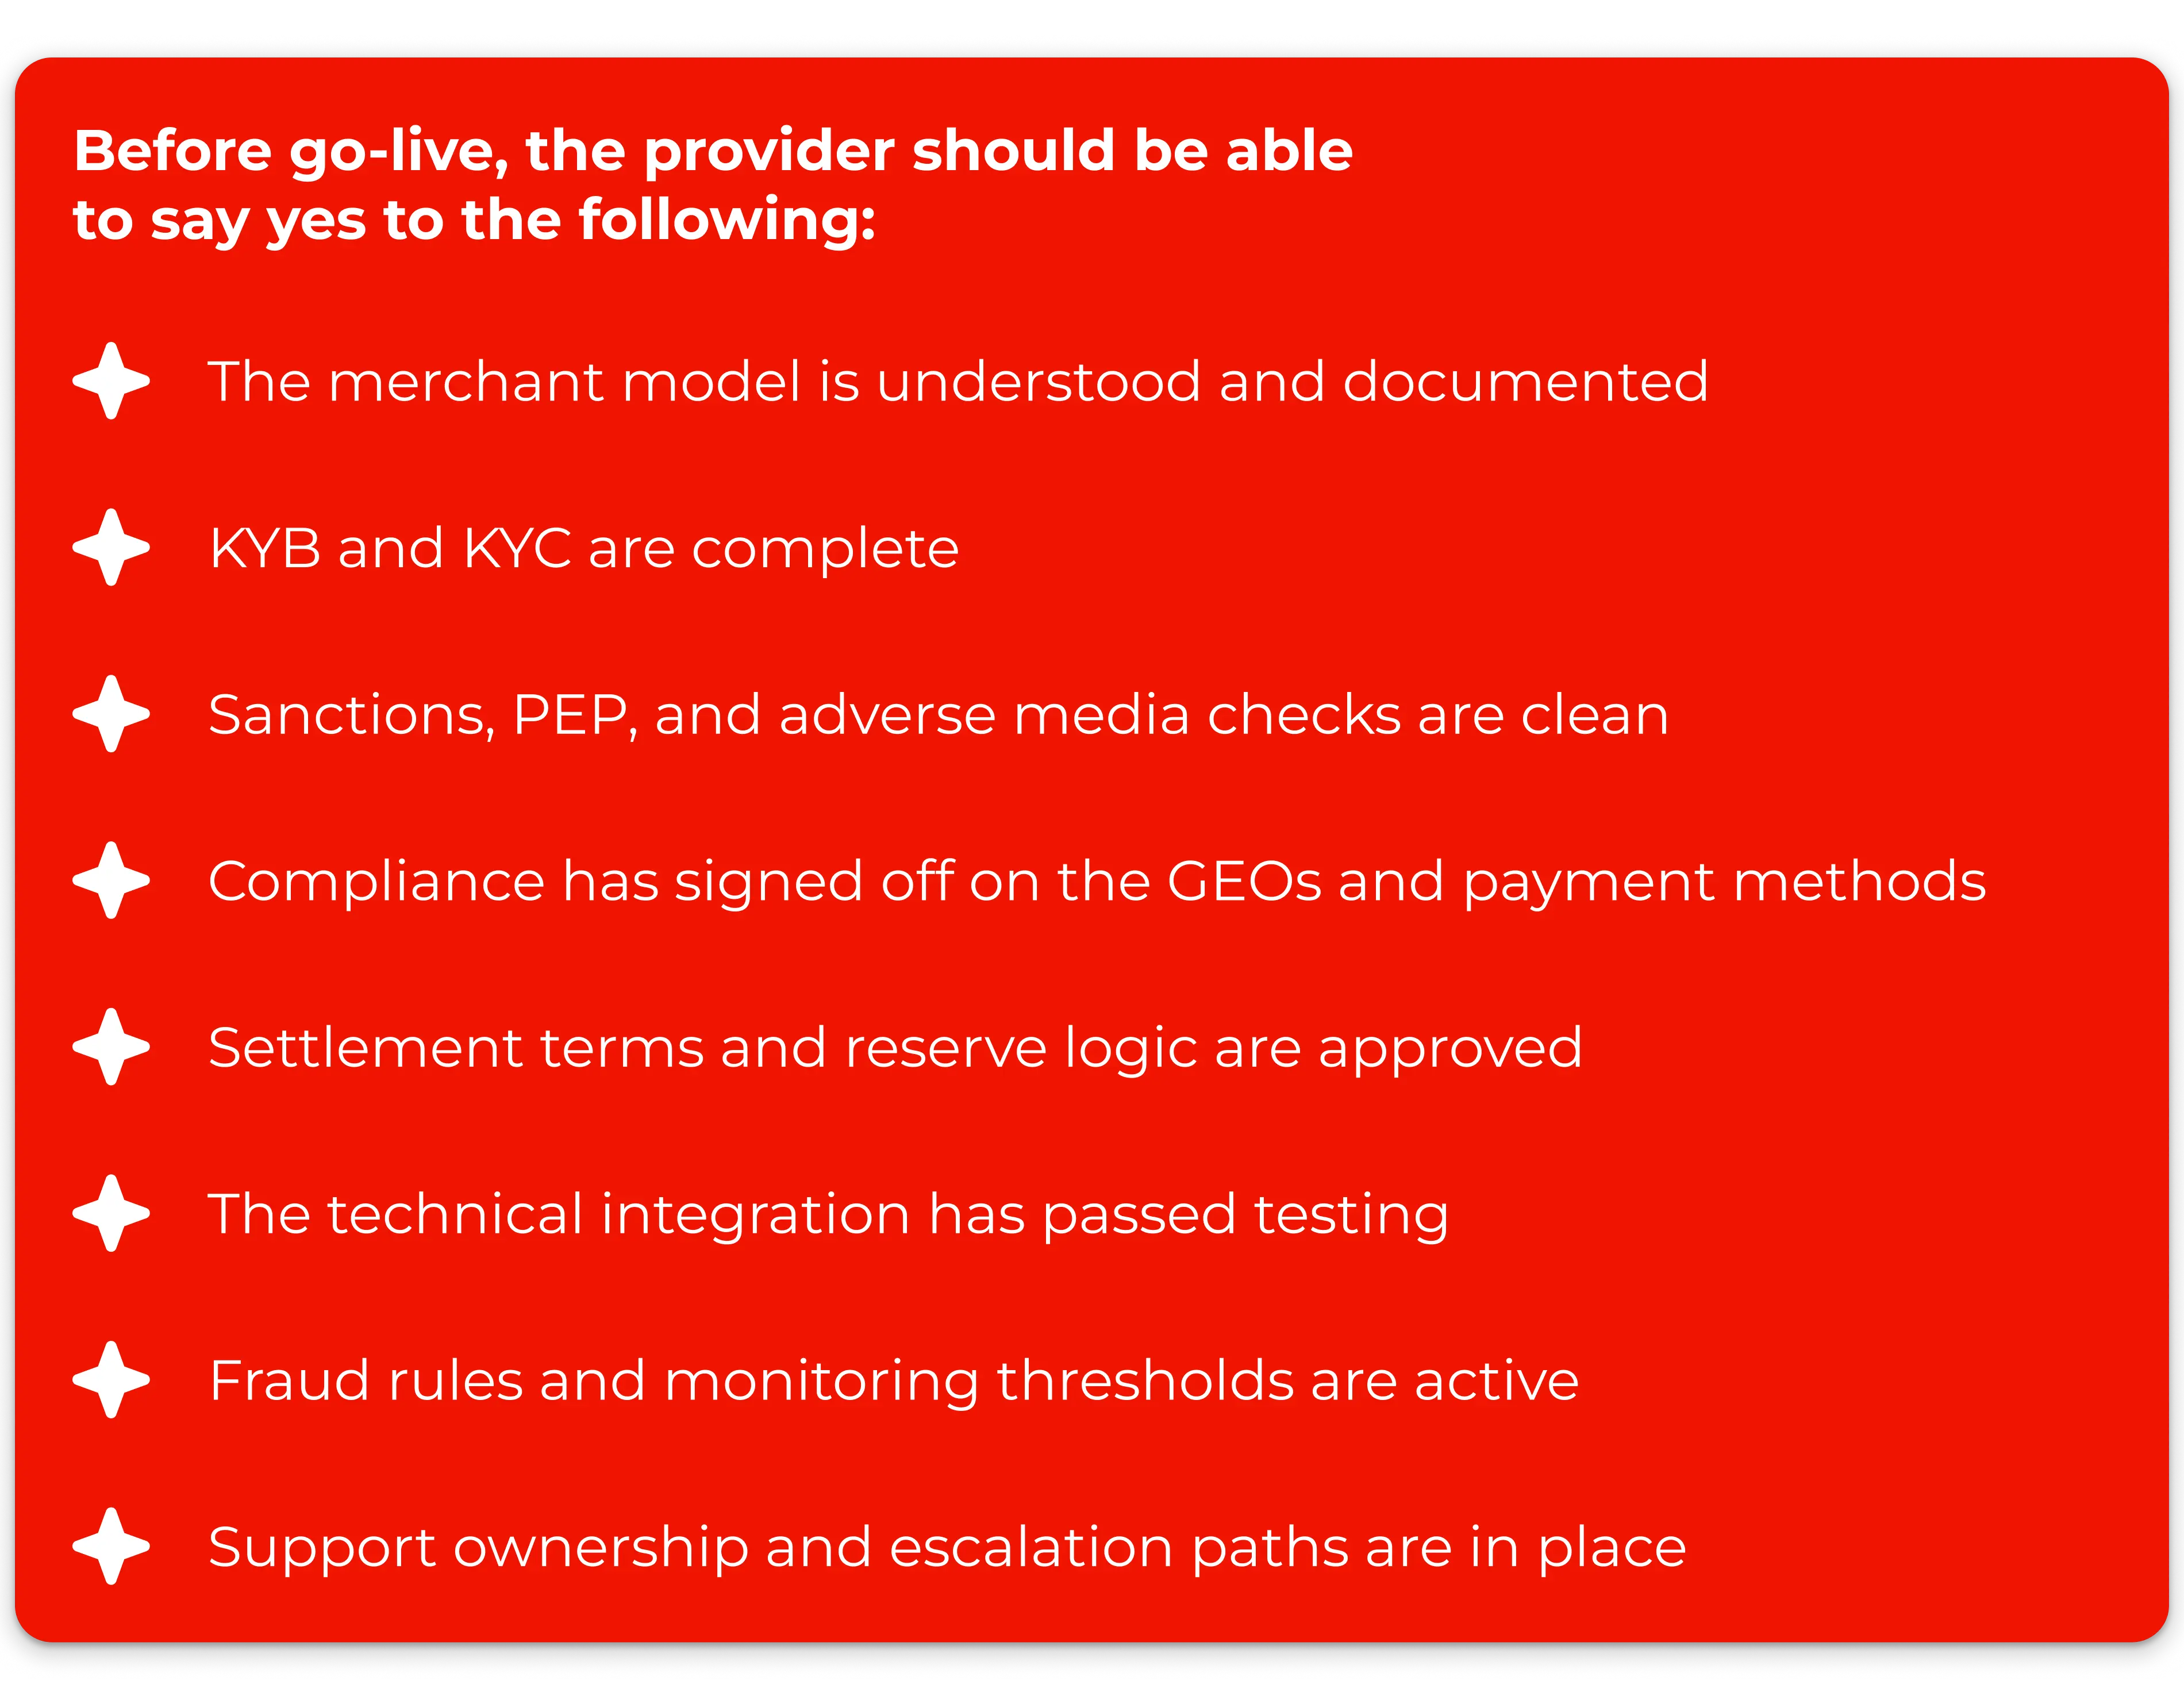
If any of these items are missing, the launch should wait. For High-Risk payments, a slightly slower onboarding process is usually preferable to an unstable first month.
Now, let’s talk about each step.
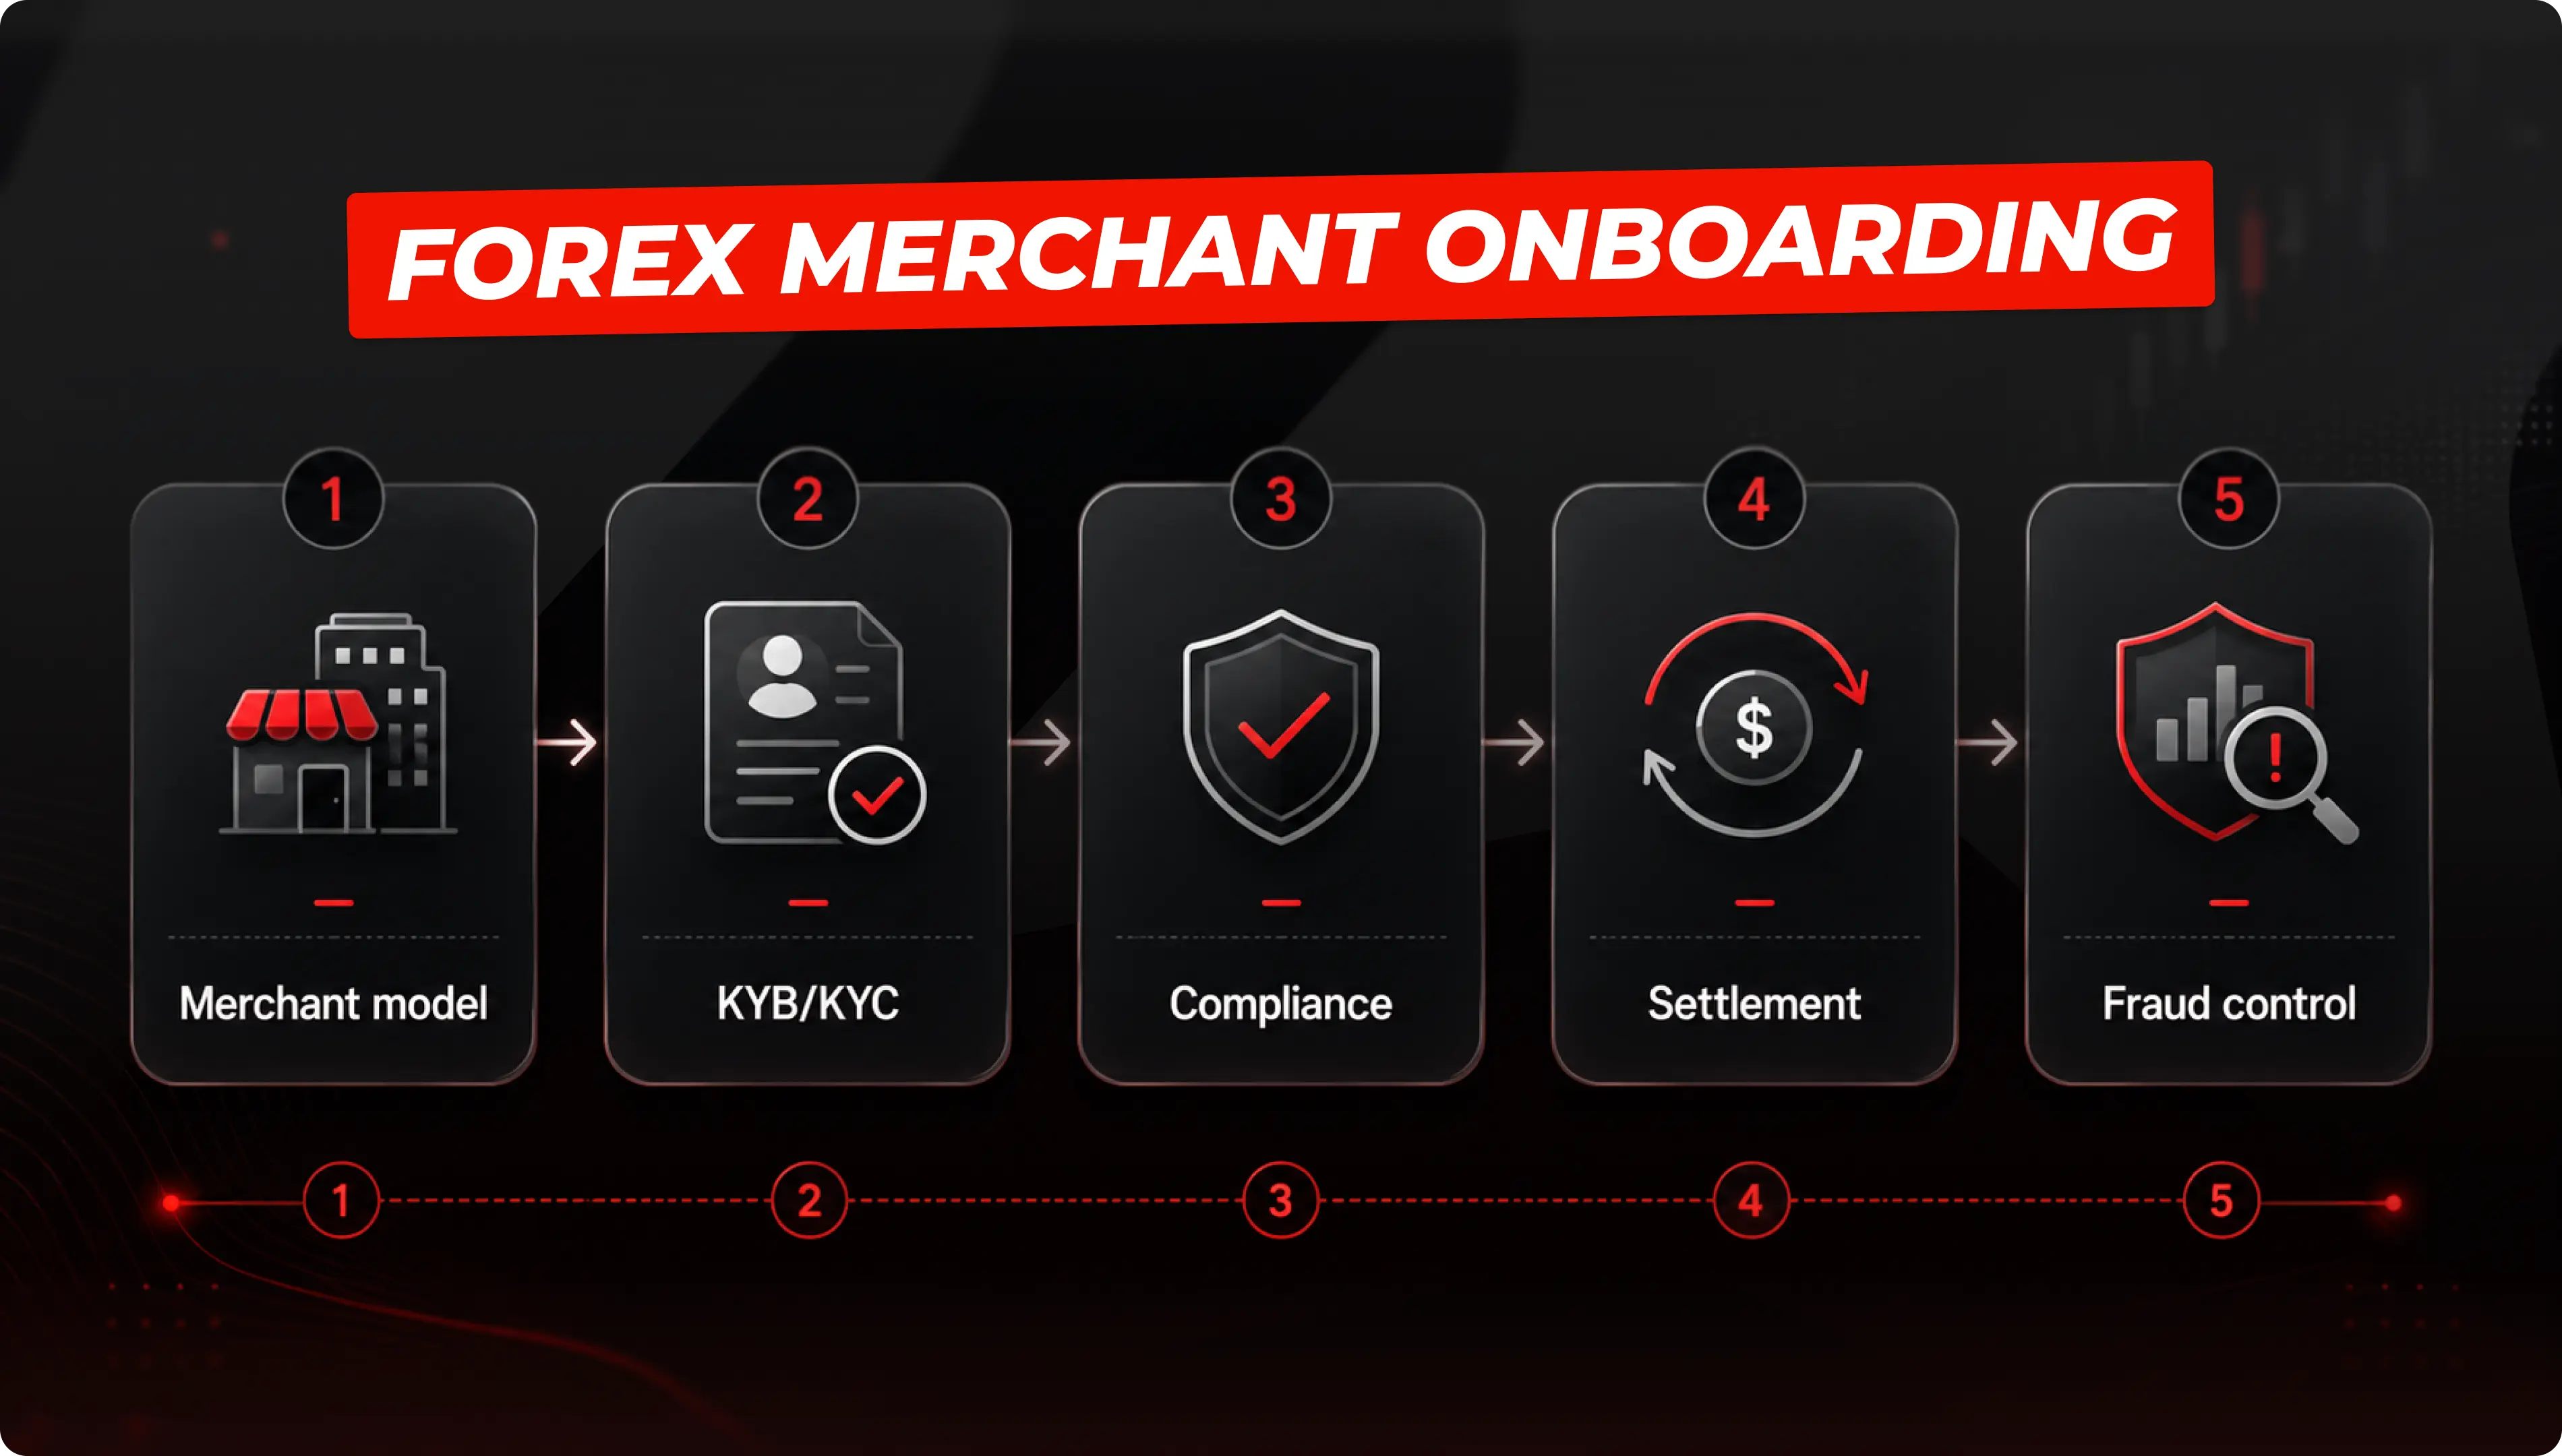
Step 1: Understand the merchant model
Before requesting documents, the provider should define the merchant model, target GEOs, products, and client acquisition channels, because these factors determine the risk profile, payment methods, and control framework. It should also confirm whether the business runs on an STP, ECN, or market-maker setup, and how deposits, withdrawals, wallets, and sub-accounts are handled.
Step 2: Run a proper pre-screen
Run a quick but strict pre-screen: verify the website, legal entity, ownership, and public disclosures; then assess the merchant’s expected volume, ticket size, GEOs, currencies, and whether it needs collections only or PayOuts as well, so you can route the case to the right underwriting path early.
Step 3: Complete KYB and KYC
For Forex merchant onboarding, KYB should cover the company, its owners, and its risk profile in one pass: registration and ownership documents, UBO and director IDs, proof of address, sanctions, PEP and adverse media checks, plus a clear ownership chart if the structure spans multiple entities or jurisdictions. For higher-risk cases, enhanced due diligence should be the default, with extra evidence on the source of funds, operating history, and control environment before approval.
Step 4: Check compliance readiness
Compliance is central to Forex onboarding: the provider should review AML policies, CDD, escalation rules, sanctions screening, and transaction monitoring, then confirm the merchant is allowed to operate in each target GEO and that client funds, refunds, and any third-party processors are handled in a way that keeps settlement and risk control intact.

Step 5: Assess financial risk
Once compliance is clear, the provider should underwrite the merchant using real processing data where possible, or a realistic forecast if the business is new, then set volume caps, reserve rules, and pricing by GEO, payment method, and ticket size so risk stays controlled as volumes grow.
Step 6: Define settlement and reserve terms
Define the settlement currency, payout cycle, and any FX conversion upfront, then set reserve rules only where risk justifies it. Clear release conditions and review triggers help merchants plan cash flow and reduce disputes.
Step 7: Match the right payment methods
Before launch, the provider should define the settlement model in full: settlement currency, PayOut cycle, conversion logic, and any reserve terms, including rolling reserves, hold periods, release conditions, and risk triggers such as chargeback spikes or compliance alerts. Clear settlement and reserve rules make cash flow more predictable and reduce disputes later.
Step 8: Test the technical setup
Not every payment method works in every GEO, so the provider should map the best methods by market and build in fallback routing. Smart routing and cascading help maintain high approval rates and reduce failed transactions when a primary rail underperforms.

Step 9: Configure fraud controls
Fraud controls should be live from day one, with rules for unusual deposit patterns, velocity spikes, GEO mismatches, and repeated failed attempts, plus clear thresholds for manual review, throttling, or escalation. The setup should be strict enough to stop abuse but flexible enough to avoid blocking normal trading activity.
Step 10: Set operational ownership
Onboarding should end with clear operational ownership: named contacts, escalation paths, service levels, reporting cadence, and a simple launch pack covering support, refunds, disputes, and alert thresholds. The merchant team should also be trained to read reports, track failed transactions, and respond quickly to chargebacks or unusual volume changes.
What good looks like after launch
After launch, the first 30 days should be treated as a monitoring phase, with close tracking of approval rates, chargebacks, refunds, settlement timing, and GEO or method-specific anomalies. If performance is stable, limits can be expanded gradually, turning onboarding into a controlled model that supports growth without weakening risk discipline.
A structured launch is much easier when the payment provider understands Forex risk from the start. SPAYZ.io helps merchants move through onboarding, compliance, integration, routing, and post-launch support with payment solutions built for High-Risk growth across MENA, Asia, and Africa.
Contact SPAYZ.io’s manager to launch your business now!